what to use for trays in ikea alexa cabinet
Desire to create your workplace with a lot of drawer storage at a low cost? This post is for you. I'yard sharing how I DIY my home part desk born with Ikea Alex desk and drawers hack, plus an Alex drawer organization DIY!
Although I'm very passionate about DIY, sometimes it could be challenging to observe time and acquire sure skills, so if you are not ready to DIY nevertheless, I've rounded upwardly my favorite desks with drawers that are super affordable and likewise looks great.
Yous tin read my recommendations in this post.
Too, for more DIY ideas to brand your home cute and office, be sure to follow me on Instagram!
How to Hack Ikea Alex Drawers Quick Video
Here's a video trailer of this project and so yous get an overview on what I did.
Yous can watch the total length video which is embedded later in this mail. Just scroll downwardly and you'll notice it nearly the Instructions.
If the video doesn't work here, you tin can watch information technology on YouTube here. I'm posting DIY videos on my channel on a regular basis, so subscribe if y'all similar to encounter more videos like this!
Home office space planning with Ikea Alex desk and drawers
Most the space
Beginning of all, I want to talk briefly about my home office floor plan, so you can decide which function of this DIY you want to apply to your own space.
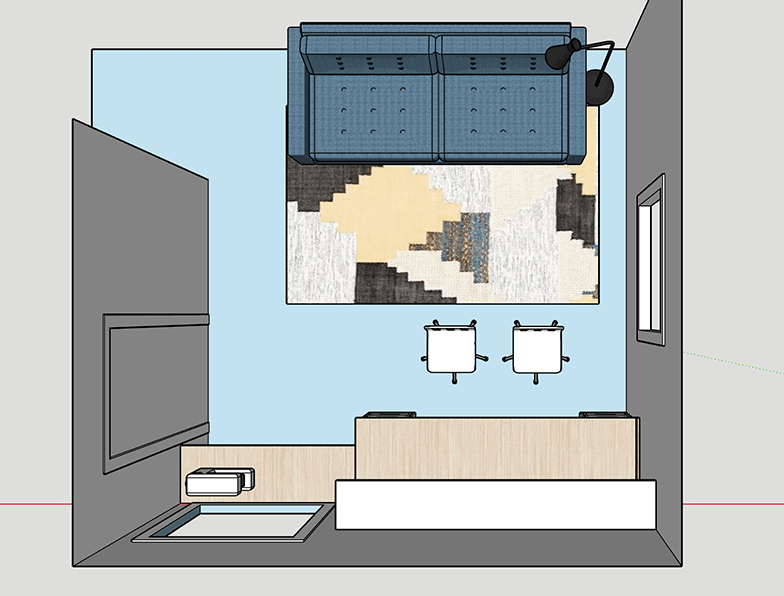
I've shared the space in depth on my abode function renovation plan post , just to recap: My home office is 11ft by 11ft, and it is intended to be used primarily every bit a dwelling house part and craft room and occasionally as a guest bedroom, given it is one of the just two bedrooms we have in our thou sqft house.
Why Ikea Alex desk hack? How much does it price?
To maximize the workspace and accomplish a custom look, I decided to create a born desk-bound.
I have consulted with a local custom cabinet company before I committed to doing an Ikea hack, and they quoted more than $3000 with some limitations on the drawers and table acme materials.
Whereas the Ikea Alex hack is westwardell under $500 which includes all the materials, with tons of drawers and customization possibilities. And then the answer is clear – Ikea Alex Hack!
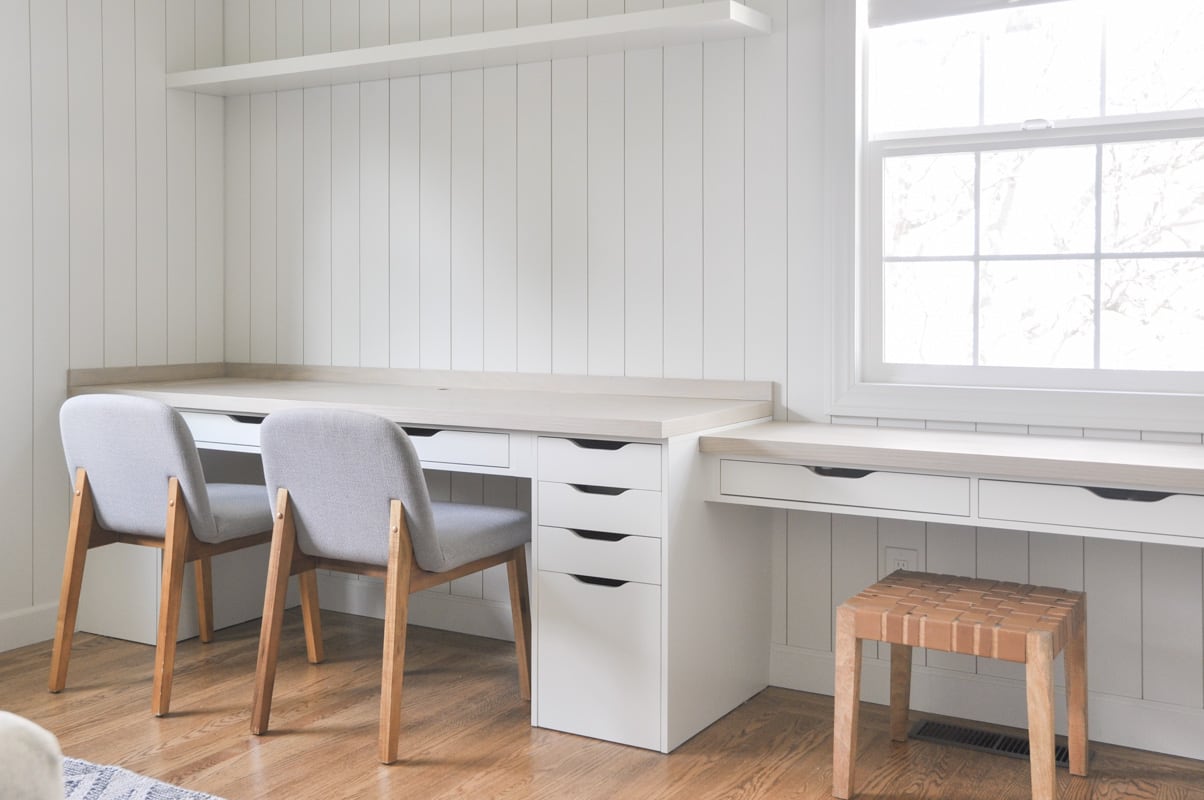
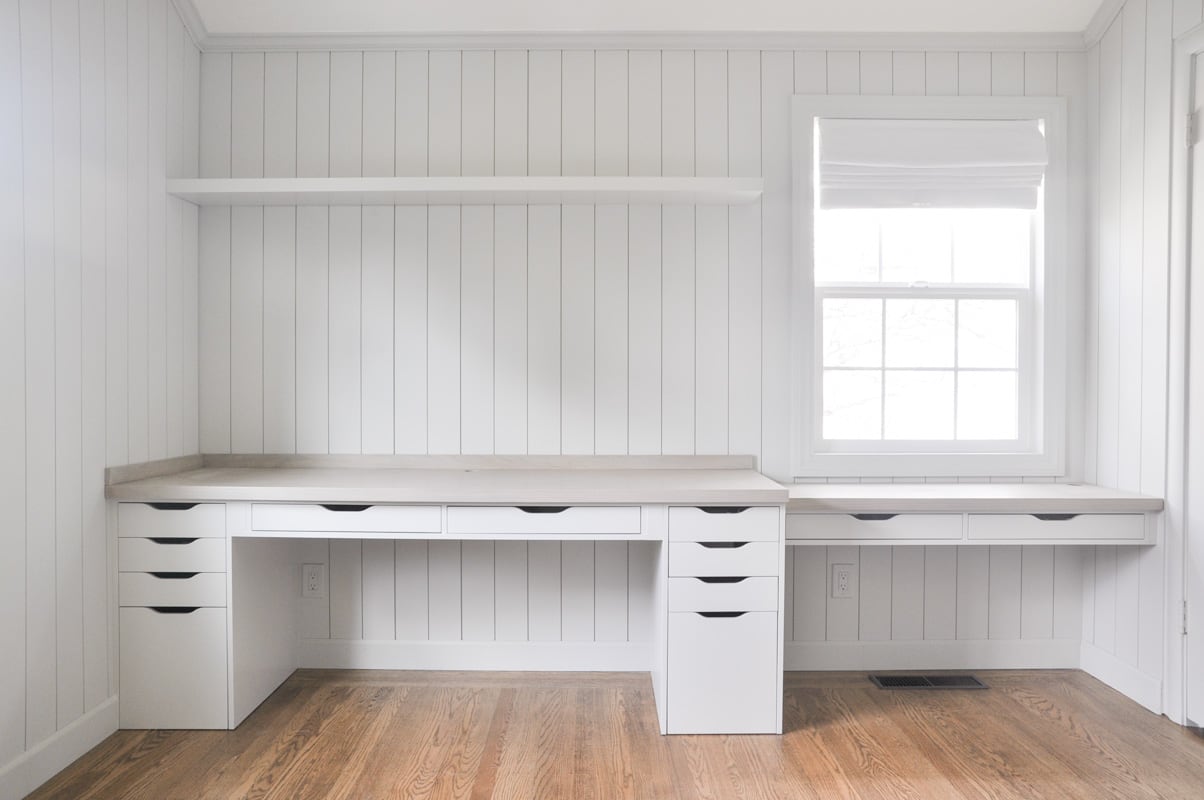
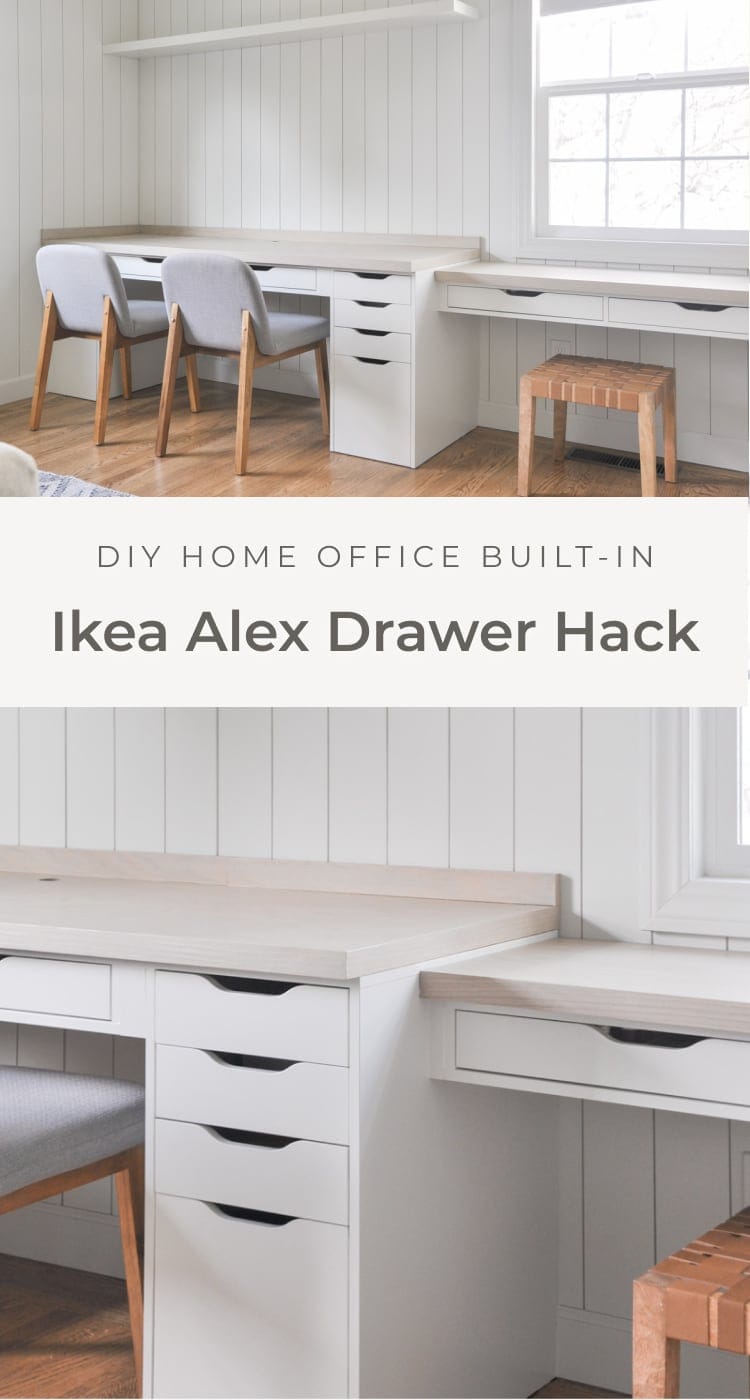
Desk built-in blueprint with Ikea Alex drawer and Ekby Alex shelf hack
Before I got right downwardly to the DIY office, I used SketchUp to create a 3D model of this desk built-in and figured out the dimensions.
This step is totally optional but I similar viewing the space in 3D to make certain my plan will piece of work since I accept not seen any design like this earlier.
Here'southward a render. After tweaking it multiple times I'grand pretty happy with the pattern solution and the amount of desk storage.
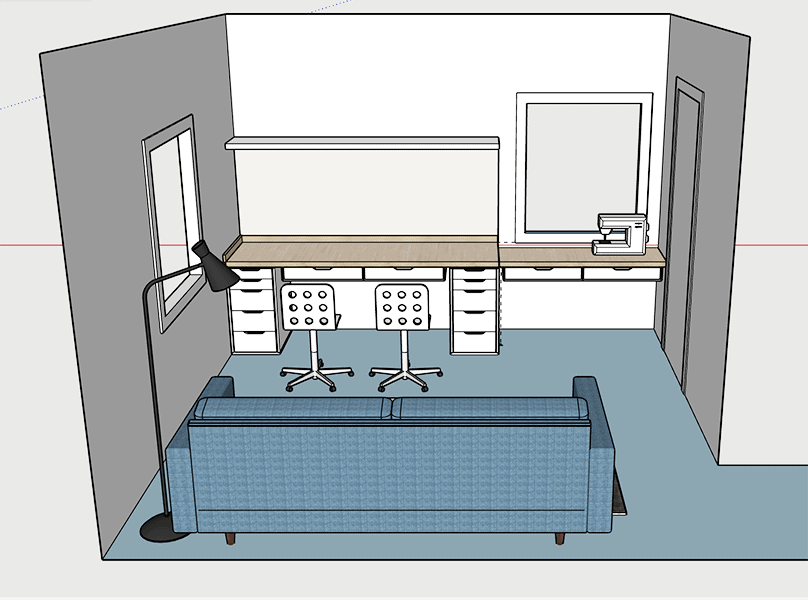
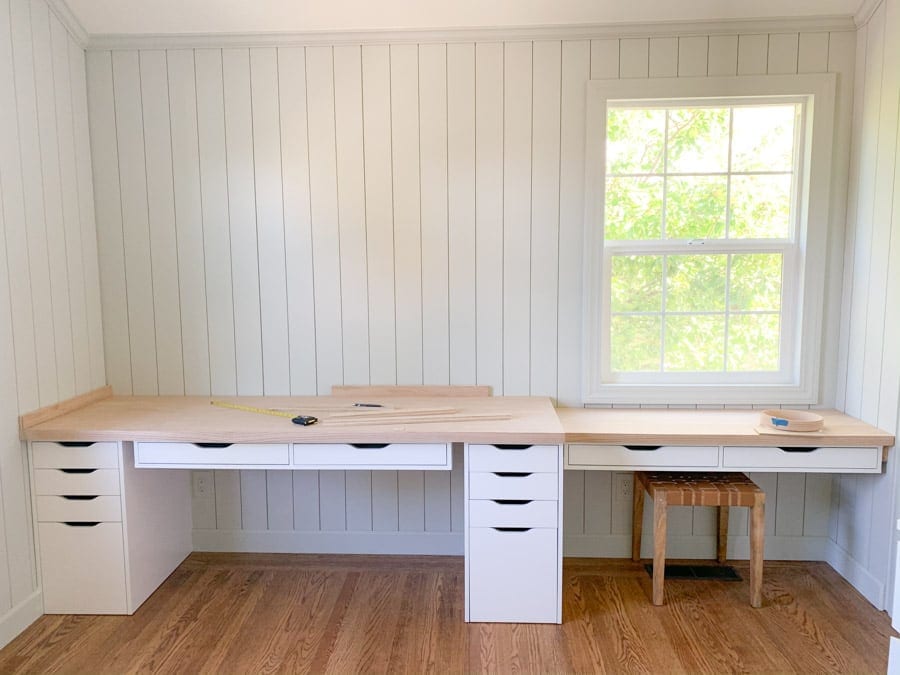
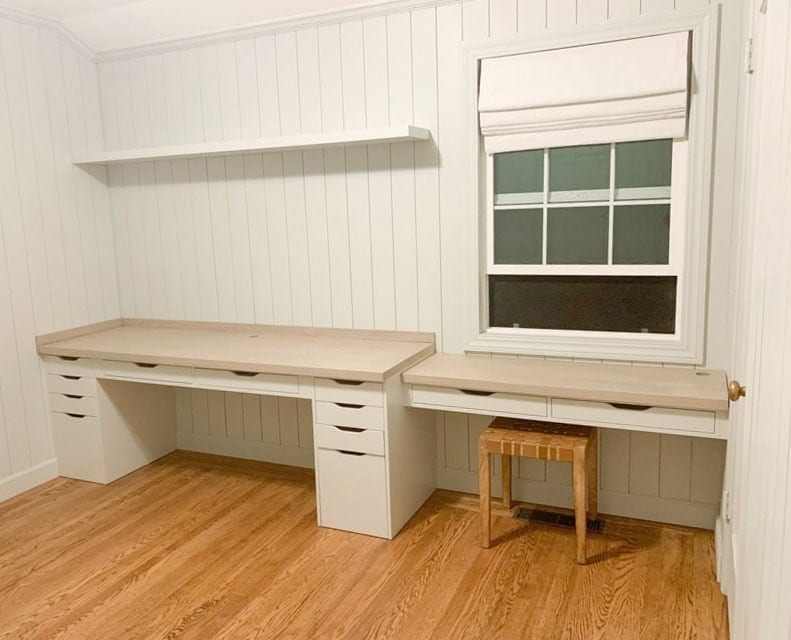
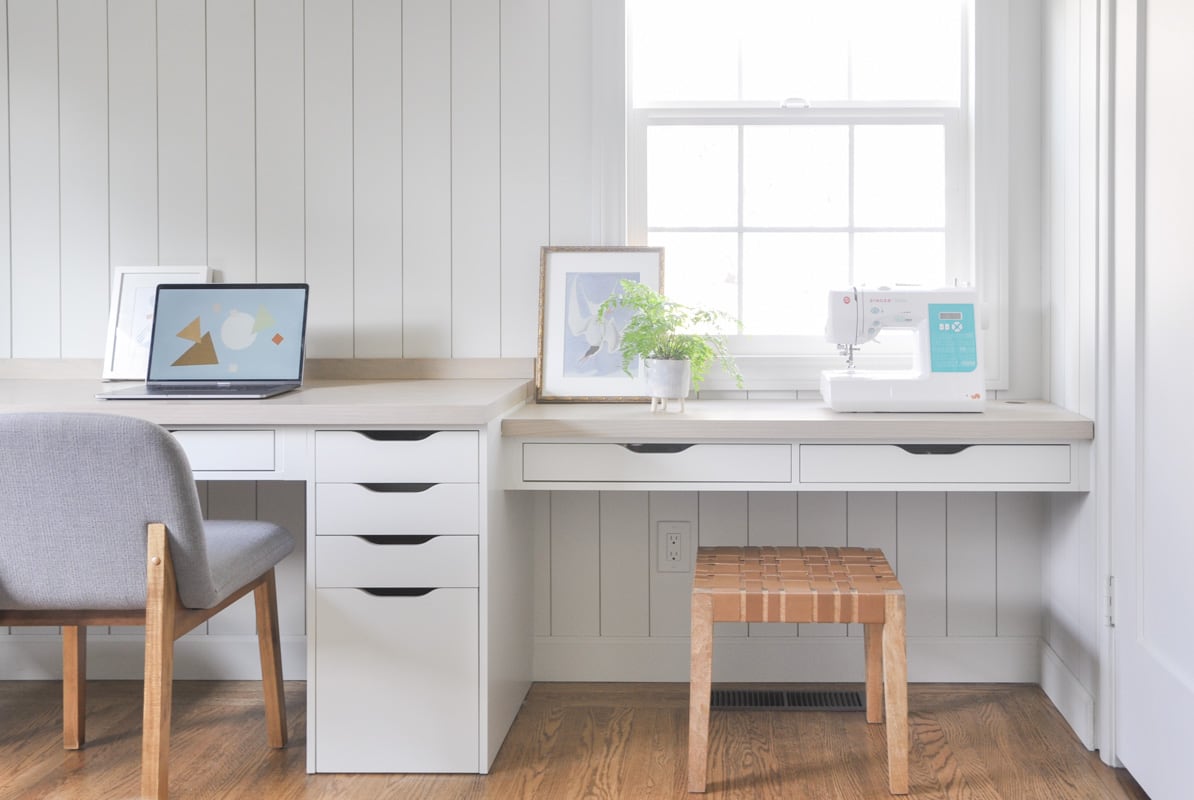
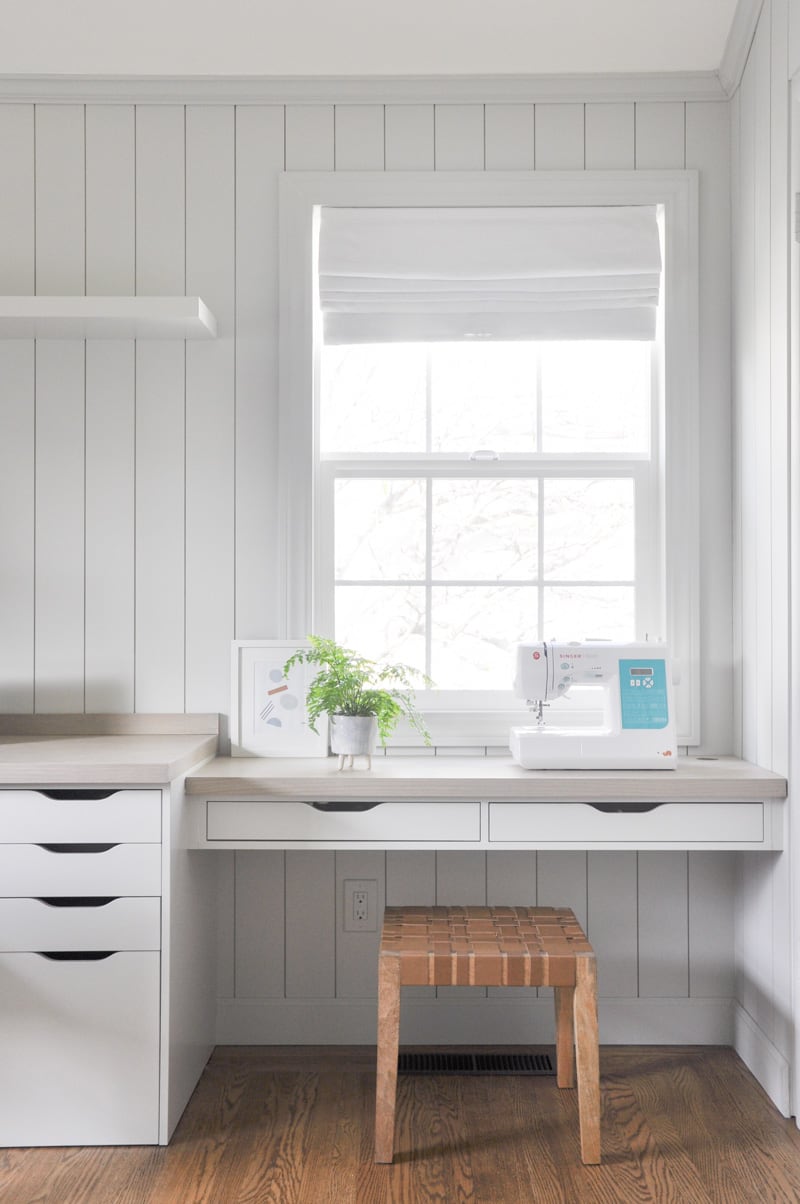
With the window on the wall and closet door to the right, I couldn't brand the whole desk go wall to wall.
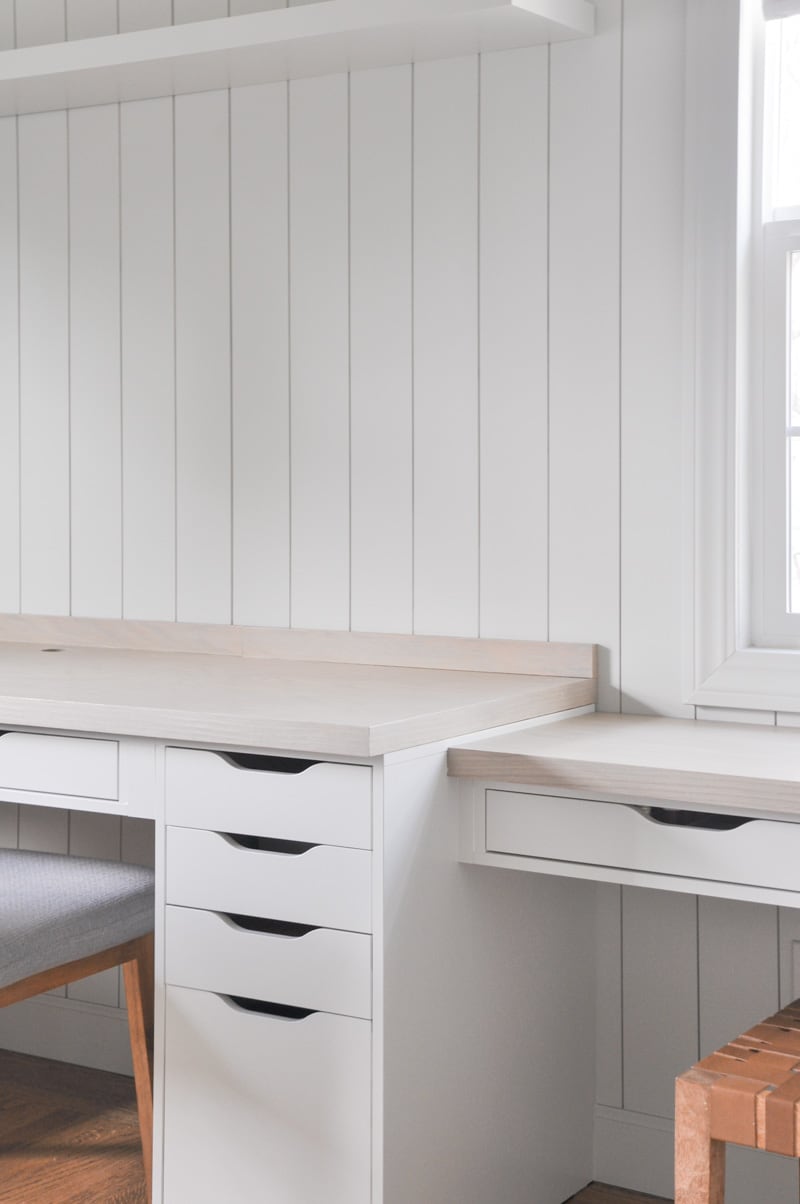
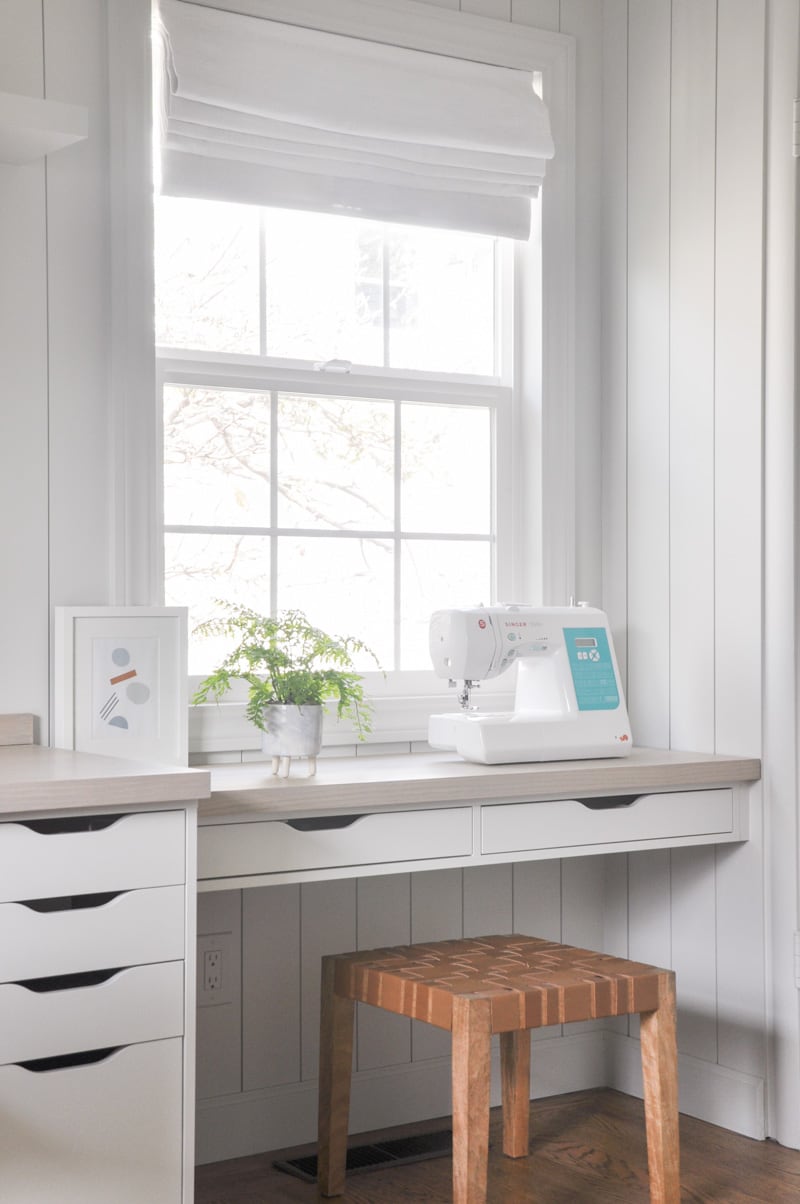
Instead I dedicated 60% of the space to a long desk with 2 Alex drawer units with drop file storage, and employ the remaining infinite for a sewing nook which is lower than the desk to accommodate the window, and shallower depth so information technology won't block the closet door.
You lot tin can see in this rendering that the sewing table is next to the closet door casing.
To add more storage, especially for the sewing nook, I decided to add together one Ekby Alex unit of measurement to each table top.
As a result, the sewing table is simply wide enough to allow me to adhere the Ekby Alex shelf with drawers(46 ⅞"), leaving plenty infinite for the desk area to allow my husband and I work side to side.
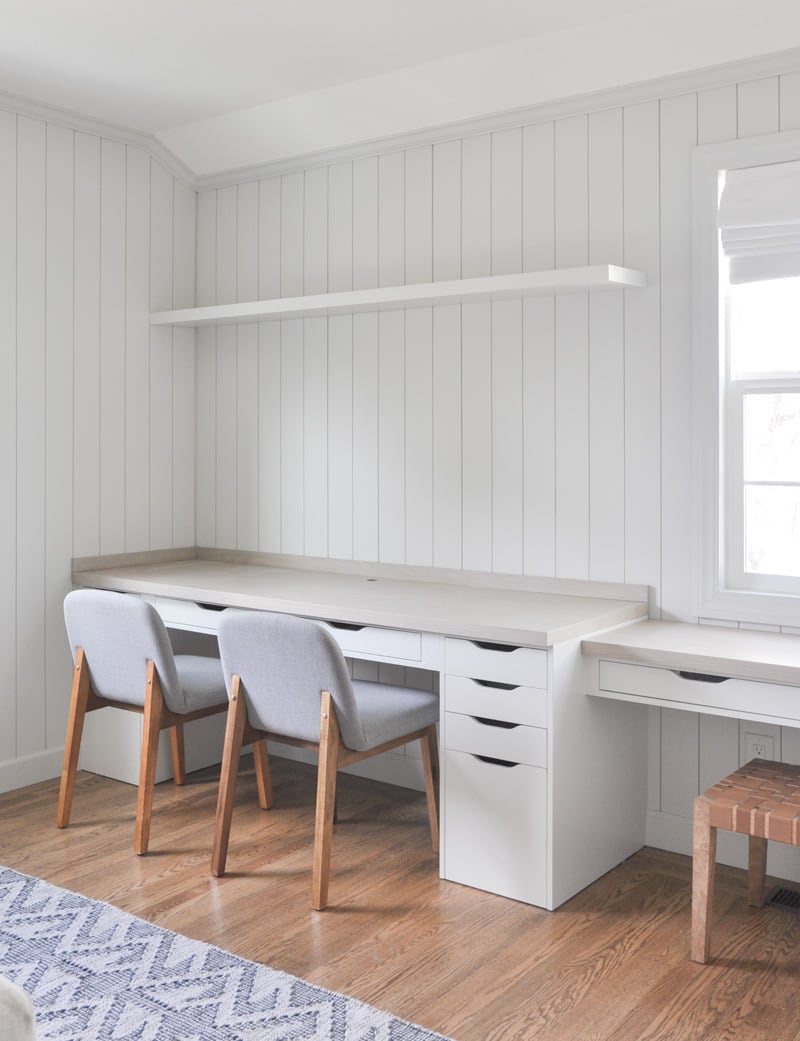
Hither's all the furniture pieces I bought from Ikea for my dwelling house office built-in desk and sewing nook:
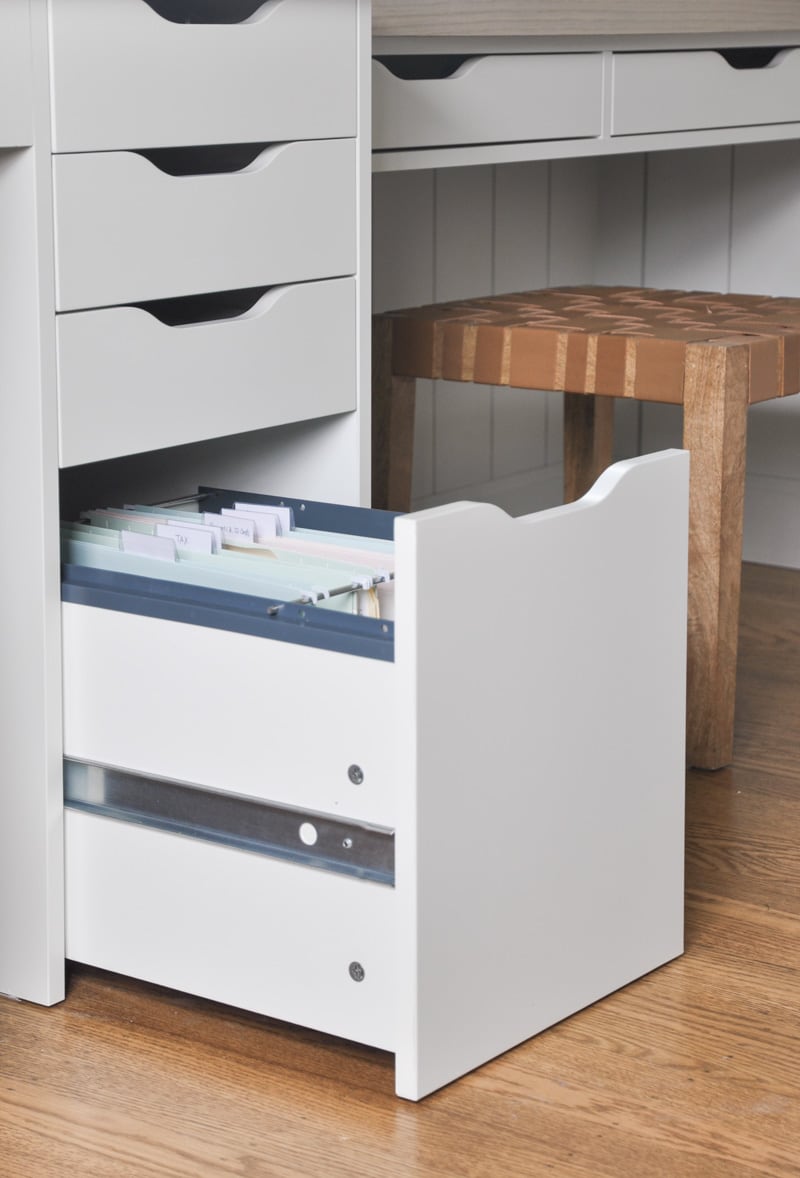
- 2 x ALEX drawer unit with drop file storage
- 2 x EKBY ALEX shelf with drawers
There's 2 configurations for Ikea Alex drawer unit of measurement, one is with a driblet file storage drawer, and the other one replaces the file drawer to two shallow drawers.
I picked the driblet file configuration because I desire to keep my file organized in my home function instead of having a separate file chiffonier.
Ikea Alex Ekby hack video
This short video will give yous an overview of how to programme your infinite with Ikea Alex drawer units, too as walk you lot through the DIY procedure.
I recommend you to sentry it and read through this weblog mail service for the full DIY instructions to make your dream home office come up true.
Also you can subscribe to you lot Youtube Aqueduct if y'all similar to watch more videos like this. I usually post video first earlier posting a blog post. Then consider SUBSCRIBE 🙂
Step past step instructions on Ikea Alex desk born hack
Gather Alex drawer unit
First, I assembled both Alex drawer units fully but leaving the drawers out. For Ekby Alex shelf, I assembled the drawers and the frame, but left the top of the frame out. This is considering later I will adhere the top frame to the desk tabletop start.
For drawers, I assembled them fully simply didn't put them in the frame. Leaving the drawers out will make the futurity installation easier, which I'll explain in the after steps.
DIY custom wood table tiptop for Ikea Alex desk-bound
Now it is fourth dimension to prepare the tabular array top which will sit down on those Alex drawer units, plus another table height for my sewing nook.
If you want to buy a table superlative, yous can get Ikea tabletop such as Linnmon . If you similar a wood finish like me, there are as well some affordable woods table pinnacle options, such every bit this walnut finish tabletop, or this beautiful light woods table pinnacle.
For this projection, only I decided to DIY my own custom table top for the following reasons:
- I wanted a wood tabular array peak because the natural wood grain hides clay and scratches pretty well
- Ikea Linnmon tabletop is but shy of a couple inches from my desired length.
In terms of tabular array top textile, I bought two ¾" thickness PureBond plywood from my local Abode Depot. I chose this specific plywood because it has a very fine cease and is formaldehyde-costless.
I picked the ruby-red oak finish for the beautiful oak grain. They also accept maple and birch finish available.
Here'south how I created the thick and sturdy table tiptop using the plywood:
1.Adhere ii plywood together.
First I did some rough cutting to the plywood so they are roughly the size of the desk and my sewing table; This also allows me to save some extra materials for a tiny backsplash equally seen in my photos.
My house is former and the wall is curved. With the backsplash pieces I can cover the gap.
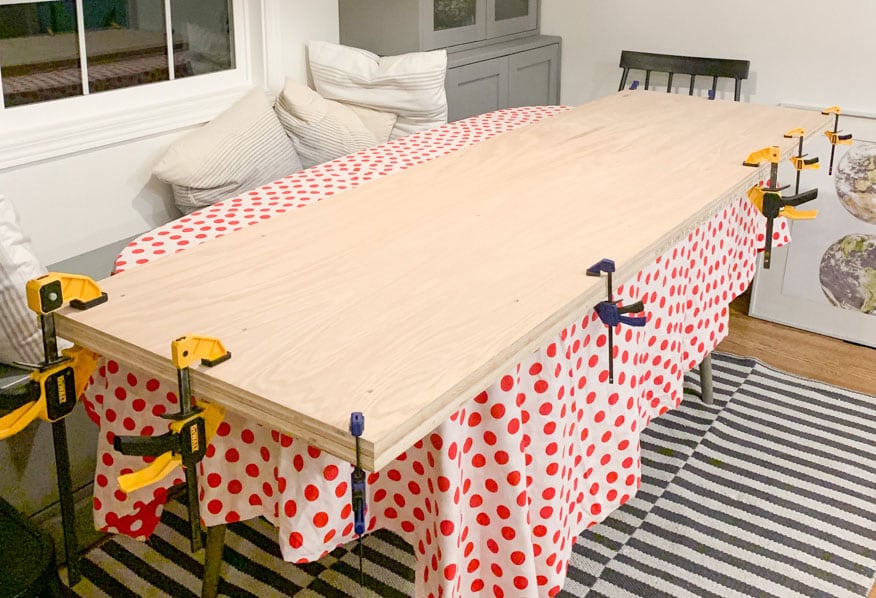
I used wood glue and 1 inch screws to attach 2 plywood together. After giving them 1 24-hour interval to dry and cure, I cut them to size with a circular saw .
When you cut them, exist mindful of which side will exist facing up since the saw blade has a management which will result in one side being rougher than the other side. I besides encourage you to use painter'due south tape to protect the cut line before cutting in order to achieve a sharper cut border.
You might want to leave a footling jerk room when you cut and trim them shorter afterwards to ensure the entire built-in will go wall to wall without any gaps.
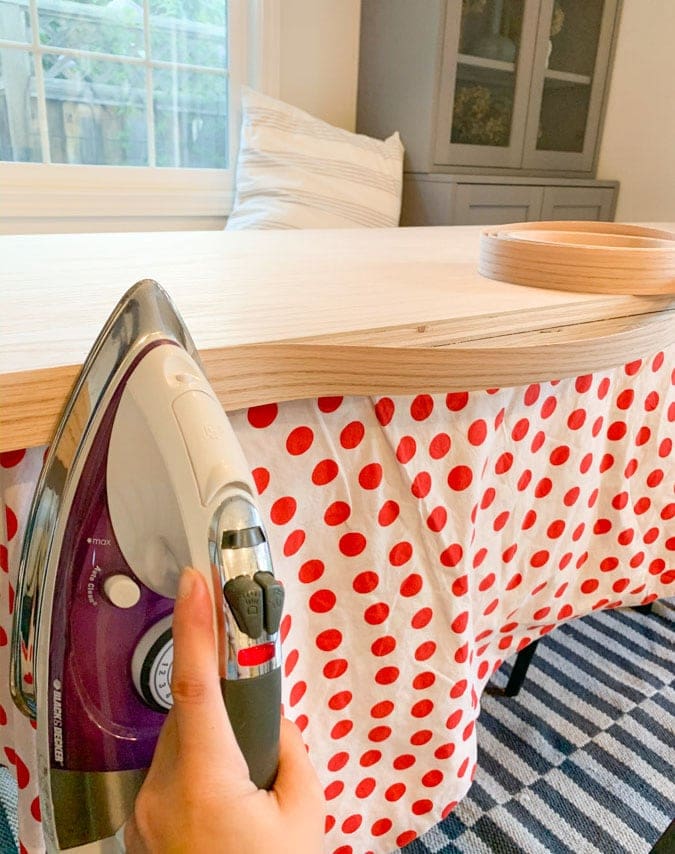
two. Add wood veneer tape
Now the tabular array top is cut to size, I applied one 1/2 inch woods veneer to the edges which volition be seen, and trim with edge band cutter, and so polish the edge with fine sanding paper.
In my case, I covered the forepart edge and the right edge. I also applied veneer to the backsplash pieces. I used red oak veneer so the entire slice will look cohesive when I stain them subsequently.
Subsequently the veneer, information technology looks like a solid woods piece rather than something that is fabricated of plywood.
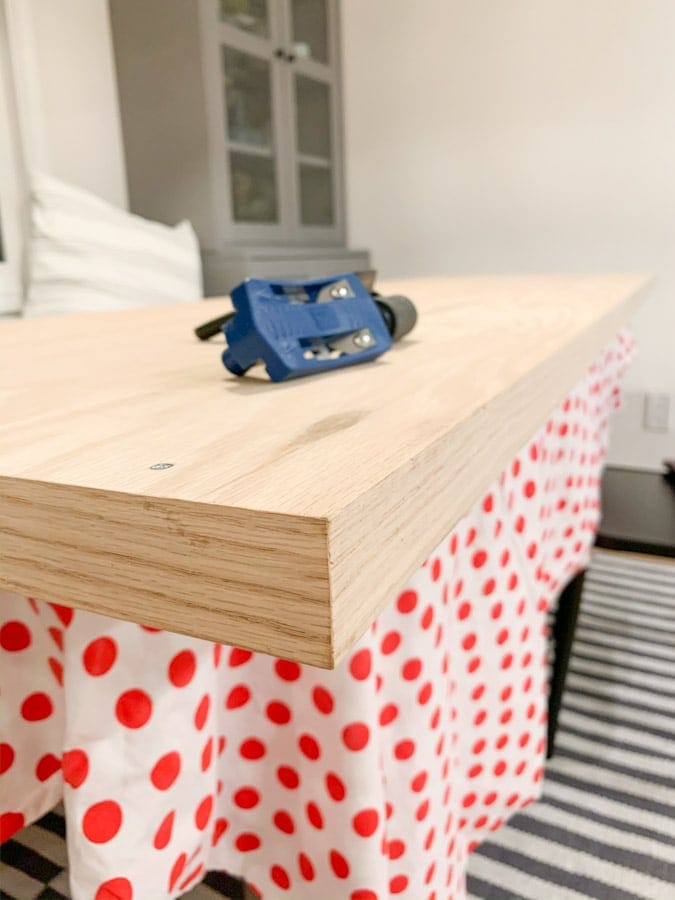
three. Staining
This step is optional as you can seal the tabular array top as is past applying a few coats of sealer.
For my table meridian, I wanted a lighter and grayer colour, so I mixed and matched several water based stains from Varathane, and landed with a end that is Weathered Oak + Sunbleached + white wax .
And then I applied three coats of h2o based sealer.
This sealer is really my become to wood sealer as information technology is h2o based, then like shooting fish in a barrel to clean and also doesn't change the wood color.
Don't forget to stain and seal the border with wood veneer also.
Gather desk built-in with Ikea Alex drawer units
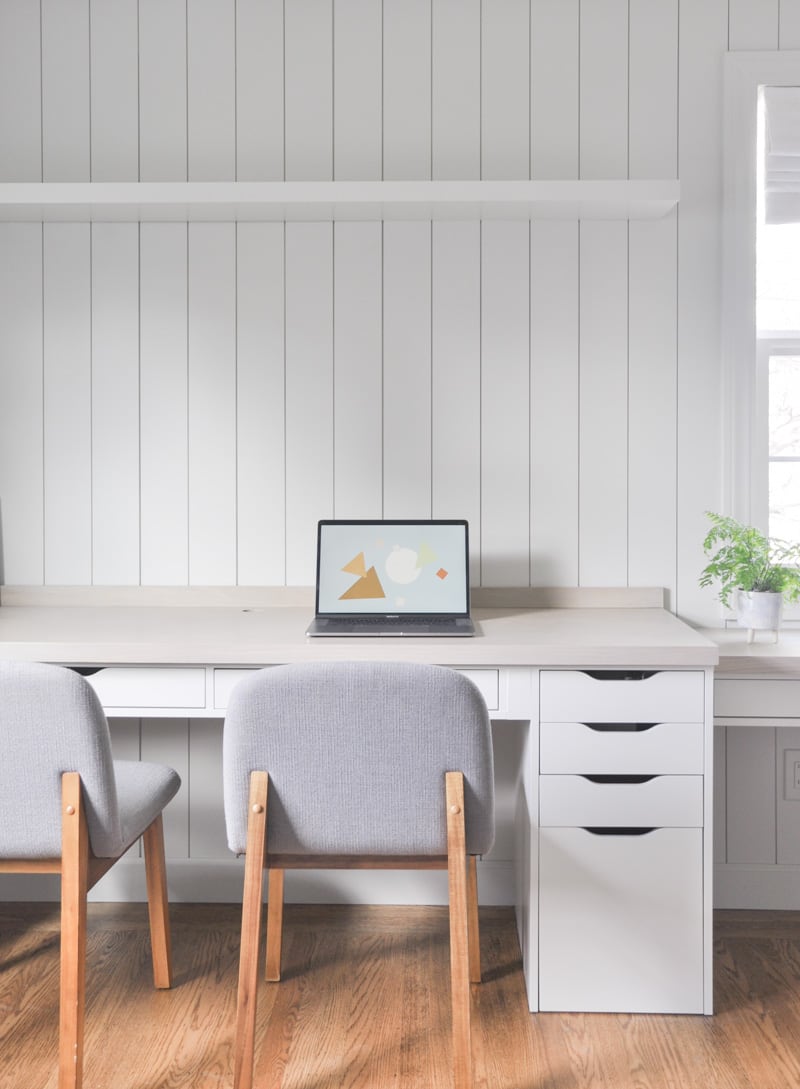
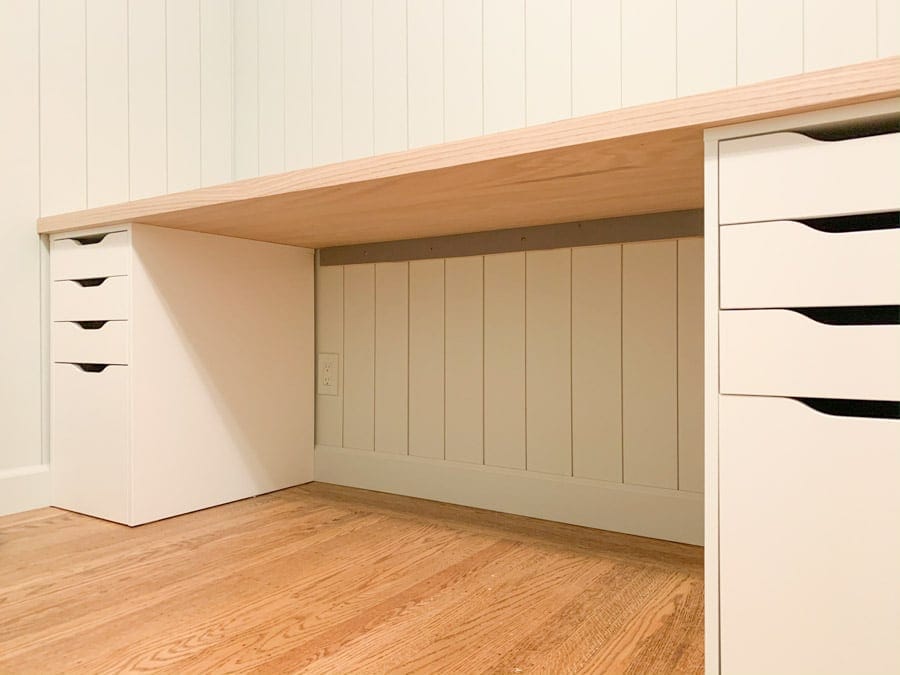
Now information technology's fourth dimension to prepare the desk congenital-in. I first placed the table top on the 2 Alex drawer units.
At this point you can slide the drawer unit so they lineup with the table top nicely. Once I was happy with the location, I attached both drawer units to the surrounding wall.
I originally had baseboards as part of the DIY vertical shiplap wall project, and then to make the drawer units flush to the walls, I cut my baseboard using Ryobi multi tool attachment to remove parts of the baseboard.
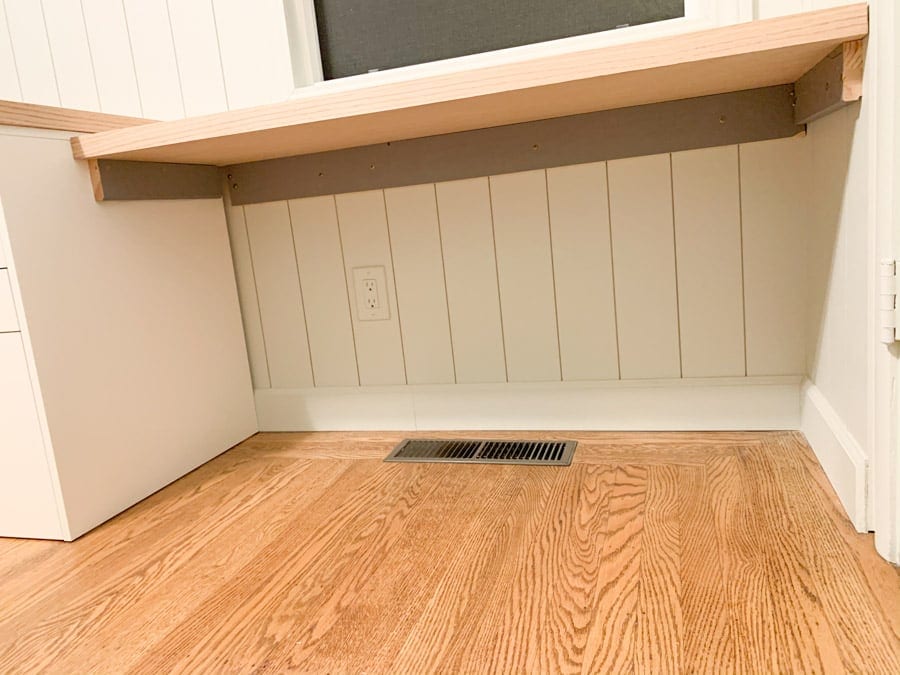
To add support for the super long tabular array acme, I add a 1 inch thick piece of wood and adhere it to the wall stud.
And for the sewing table, I used three pieces: i piece to the dorsum wall, merely like the long desk; 1 piece attached to the Alex drawer to the left; one slice attached to the correct side wall.
Try to attach them to equally many studs equally possible for maximum strength. I used Stud Buddy to find studs, and marked the studs with painter's tape.
Alternatively you can use the Ikea Adils leg to back up the center of the desk but I want to keep a clean look and also to make certain in that location's enough space to hang the pencil drawers.

In one case you are sure with the placement of tabletop, Yous can secure it in place.
Since the tabletop is already placed on the Ikea Alex drawer units, I used a few L brackets to attach the table to the wall – in my case, it is attached to the horizontal wood board right below tabletop.
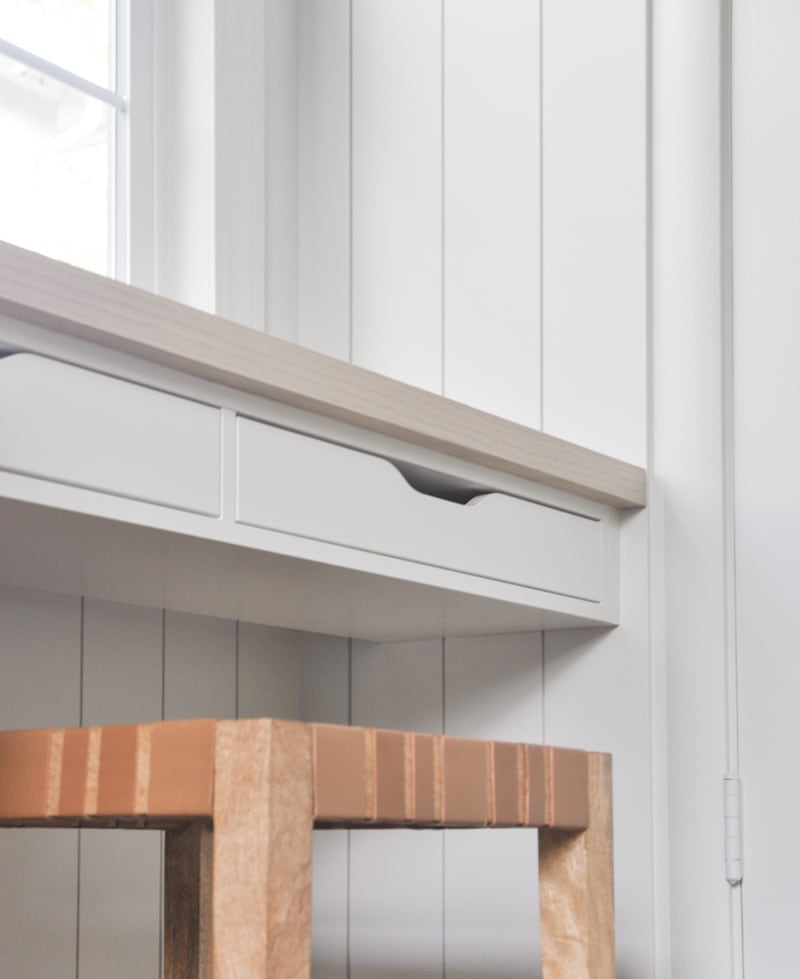
Add pencil drawers (Ekby Alex shelf with drawer hack)
Before calculation the pencil drawers, confirm that you are able to comfortably fit your legs. The space is perfect for me.
However, my husband is six'2″ and he is not able to comfortably fit his legs under the pencil drawers. If that's the case for you, you will need to decide whether y'all desire to go without the pencil drawer, or raise the desk-bound a few more inches to fit comfortably.
At this step, I will cover those tabular array elevation supporting boards with past Ekby Alex shelf.
Remember at the article of furniture associates phase I recommended leaving the meridian off? This is the step information technology will exist useful 🙂
I outset fastened pencil drawer top frame to the table top with 1.5 inch screws, then added the balance of the drawer frame, following the installation manual came with Ikea. Once I attached the unabridged frame to the table top, I slid in the drawers.
The same method applies to the sewing tabular array. As an additional step, I secured the pencil drawer frame to the left and correct supporting boards. This is made possible due to the pencil drawer is sandwiched right between the supporting boards.
You can see in the photo above that there'due south gaps between the Ekby shelves and Alex drawers. Don't worry, we volition fill the gap in the next pace ?
Add filler pieces, then paint over
Now it is time to fill the gap between the Ekby shelf and Alex drawer unit.

I covered the front and lesser sides of the gap with ¼ inch MDF boards. I basically glued some fleck pieces to the left and right side of the inner gap, and glued the filler slice to them. same method applies to the bottom filler piece.
Here's what it looks similar after painting it over:
I and so covered visible seams with speckle . I didn't encompass it completely because the Ikea Alex series has information technology seams between each lath, so I was basically embracing that look.
Then it is time for the painting job. I first primed it with Zinsser Bulls Heart primer which works swell with Ikea laminated finishes.
Then I painted the entire built-in with iii coats of Benjamin Moore Moonshine ( the same every bit my wall paint colour). I did use a dissimilar sheen and product line within Benjamin Moore for durability : satin finish from their Advanced line.
That is the entire process for the desk built-in!
Next I'll talk well-nigh some upgrades you can do to it, such as DIY arrangement dividers for Alex drawers, plus how I modified the chair height for my sewing nook since information technology is lower than normal table height.
Alex drawer arrangement DIY
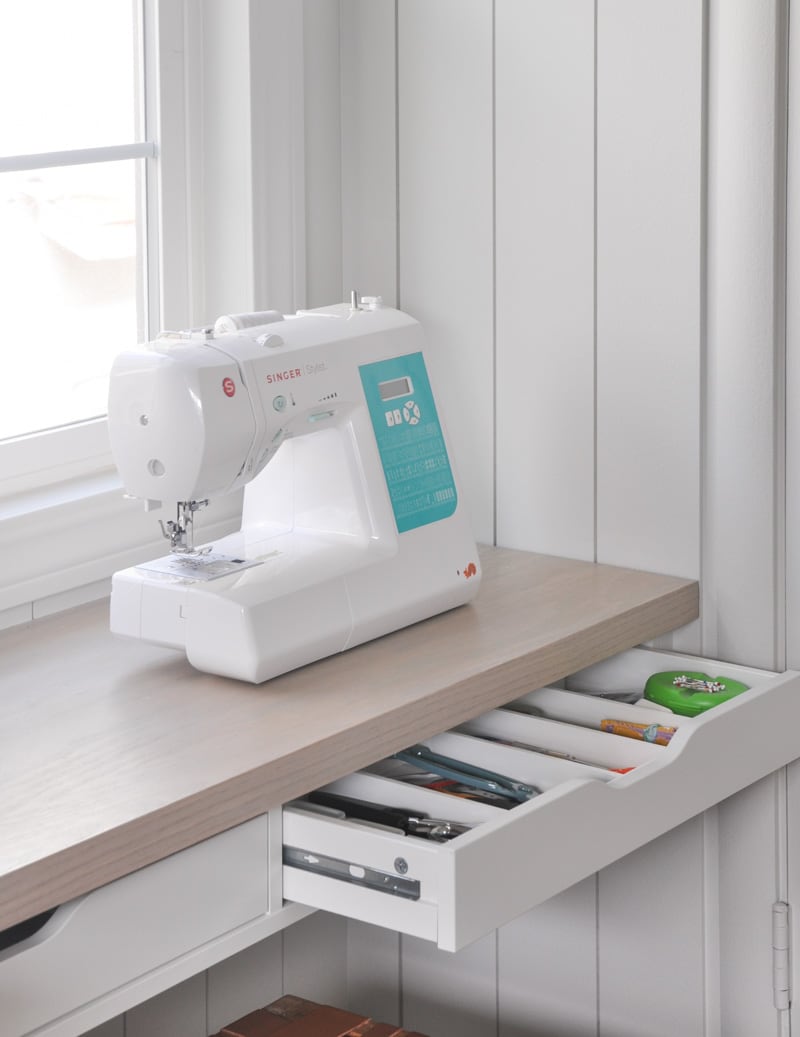
Well-nigh of my sewing storage will exist in my home office closet , and so I wanted the sewing pencil drawers to be able to hold as many near used tools equally possible without having to visit the closet.
For the cloth, I used 1/4in MDF boards, which is the leftover from this project – in the filler step.
I start by measuring the inside of Ekby Alex drawer, and determine on how many slots I want for this drawer. I and then cut them to size and glued them with wood glue .
My recommended top for the divider is one.five inch. The reason is each drawer has a cutout serving as drawer pull and you lot probably want the divider to exist below that. Also avoid having any divider in the cutout role.
Y'all can see in this photo beneath I left the center free of divider then I can pull the drawer open without touching the divider.
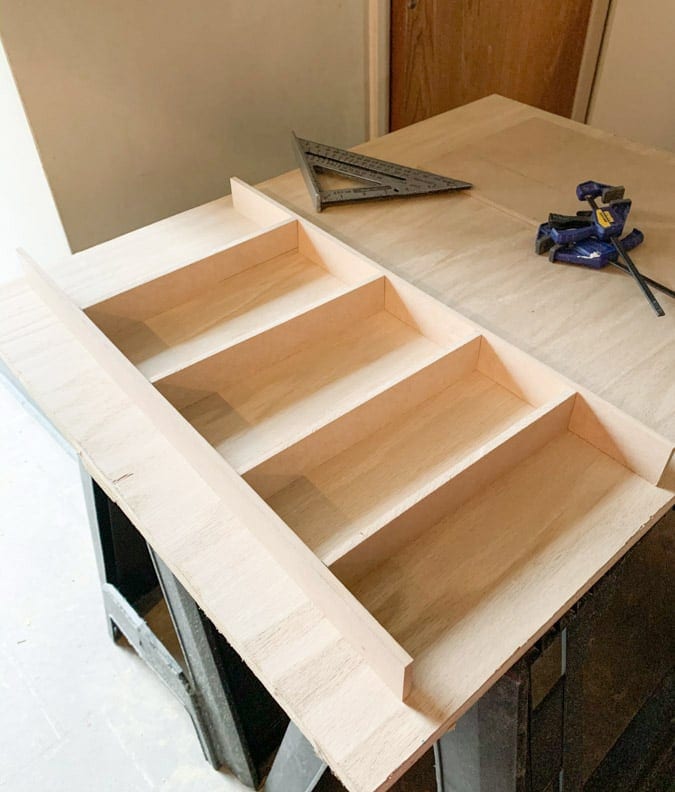
I waited 24 hours for the woods gum to dry and cure. Then I painted it white to friction match the inside of Ikea Alex drawer. Since it is entirely held by glue, do handle it gently until it safely arrives inside the drawer.
I thing to note is Alex drawer won't come up all the way out, unlike drawers from Ikea kitchen chiffonier line. Just something to keep in mind while you design the drawer divider for organization.
Adjust chair height for sewing table
To avoid running into the window, my sewing table is lower than a normal tabular array. So it is a bit challenging to discover a chair at the right height.
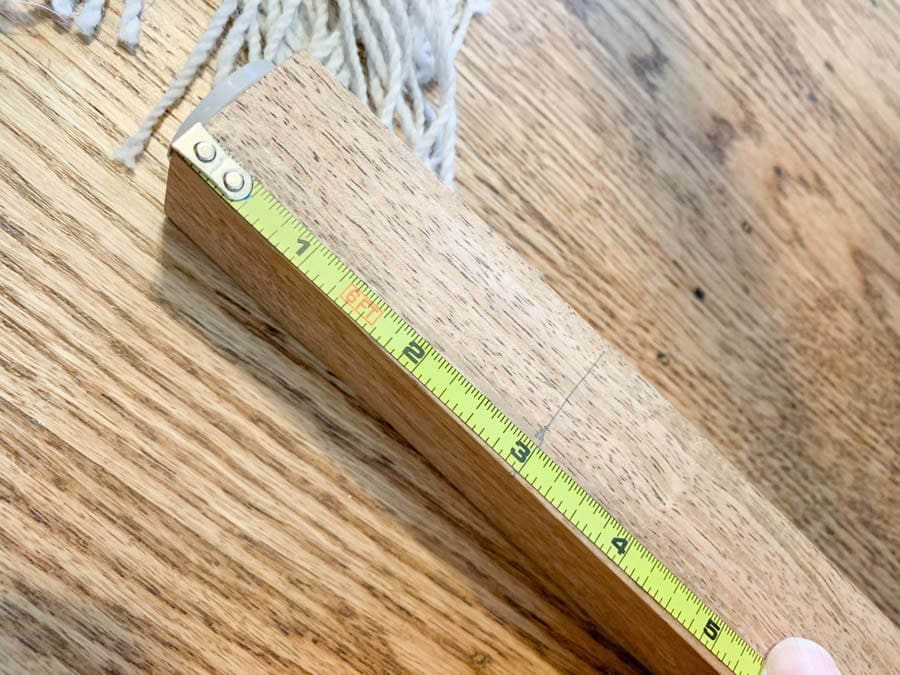
And so instead, I made the chair shorter. I hunted down a leather strap stool for merely $x from Facebook Marketplace and cut all four legs iii inch shorter.
I picked the stool for its slim leg shape, so no 1 tin tell I take cut it short. This is a photo I took before I trimmed the legs:
and you tin can come across there wasn't non plenty room betwixt the stool and drawers.
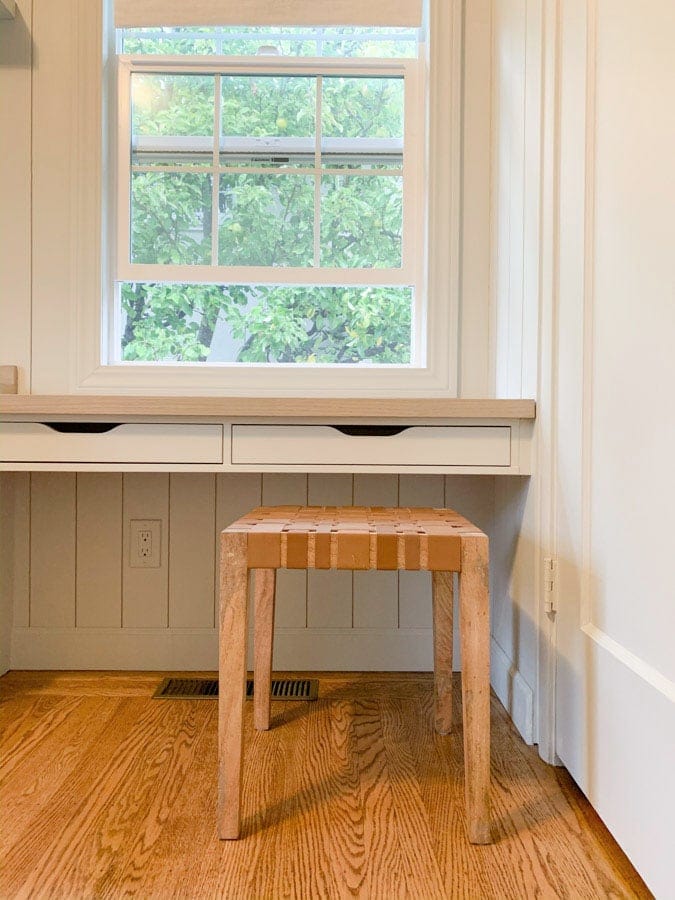
And this is after I trimmed the legs and I can sit comfortably in this sewing nook:
Cheers for following all the style to the end of the post! I promise yous discover some ideas and tricks from this Ikea Alex desk hack!
Really this tutorial was requested multiple times since I posted a sneak peek on my Instagram page so here you go 🙂
To check out my sewing/crafting closet which is also an Ikea hack, you tin detect information technology here .
More DIY Ikea Hacks
DIY IKEA Banquette Seating Built-in | IKEA Havsta Hack
Home Office Closet Makeover with Ikea Trofast Hack
DIY Window Seat with Ikea Nordli Drawers
Pivot it for later
Source: https://hydrangeatreehouse.com/ikea-alex-desk-hack/
Post a Comment for "what to use for trays in ikea alexa cabinet"